
These Mummy Rice Krispie Treats turn a familiar no-bake cereal treat into a fun Halloween dessert with just a few simple ingredients. Gooey mini marshmallows and crispy Rice Krispies create the classic chewy-crunchy base, while melted white chocolate gives each treat a spooky mummy-like finish. Candy eyeballs add the final touch and make them instantly recognizable as a Halloween treat.
They’re especially handy when you want something festive without spending hours decorating. The treats come together on the stovetop, and the white chocolate drizzle does most of the decorating work. Kids can also help place the candy eyes, making these a playful project for Halloween parties, school treats, or a family dessert table.

Why You’ll Love These Mummy Rice Krispie Treats
- Simple ingredients: Butter, mini marshmallows, Rice Krispies cereal, white chocolate, and candy eyes are all you need.
- No oven required: The cereal mixture is prepared on the stovetop, so there’s no baking involved.
- Easy Halloween decoration: White chocolate creates the mummy “bandages” without requiring detailed piping skills.
- Great for parties: Individual treats are easy to arrange on a Halloween dessert table and serve to guests.
- Kid-friendly decorating: Once the white chocolate is ready, adding the candy eyes is an easy job for little helpers.
- Make-ahead friendly: The treats can be prepared ahead of time and kept ready for serving.
Preparation and Tools
You’ll need a large saucepan or pot for melting the butter and marshmallows, plus a large mixing bowl if you prefer to combine the melted mixture with the cereal separately. A sturdy spatula or wooden spoon is useful for stirring because the marshmallow mixture becomes thick and sticky quickly.
For shaping the treats, lightly grease the pan or surface you use so the sticky cereal mixture releases more easily. A sheet of parchment paper can also make handling and cleanup simpler.
Have the white chocolate and candy eyes ready before you begin decorating. The Rice Krispie mixture firms up as it cools, so it’s easier to shape and decorate while everything is prepared and within reach.
Preparation Tips
Keep the marshmallow mixture smooth
Melt the butter first, then add the mini marshmallows and stir until they are mostly smooth and melted. Keep the heat moderate and stir frequently. Overheating the marshmallows can make the finished treats firmer and less pleasantly chewy.
Add the cereal promptly
Once the marshmallows have melted, work fairly quickly when combining them with the Rice Krispies cereal. You want every piece of cereal coated before the mixture begins to set.
Don’t press too firmly
When shaping the cereal mixture, use gentle, even pressure. Packing it down too tightly can make the treats dense instead of soft and chewy.
Let the treats cool before decorating
The white chocolate should be applied after the treats have had enough time to set. If the cereal mixture is still warm, the chocolate can spread more than intended and the candy eyes may shift.
Prepare the decoration first
Melt the white chocolate before you start decorating. Once the treats are ready to handle, you can quickly create the mummy design while the chocolate is still fluid.
Ingredients
Butter: Butter helps melt the marshmallows smoothly and adds richness to the cereal mixture.
Mini marshmallows: These provide the sticky sweetness that binds the Rice Krispies together. Mini marshmallows melt relatively quickly, making them convenient for this preparation.
Rice Krispies cereal: The cereal gives the treats their signature crisp texture and light crunch.
White chocolate: Melted white chocolate forms the mummy’s white “bandages” across the surface.
Candy eyeballs: Candy eyes transform ordinary cereal treats into recognizable little mummies. Mini chocolate chips can also be used as an alternative if needed.

Cooking Instructions
Step 1: Melt the Butter
Place 3 tablespoons of butter in a large saucepan over low to medium-low heat. Allow the butter to melt completely, keeping an eye on it so it does not brown.
Step 2: Melt the Marshmallows
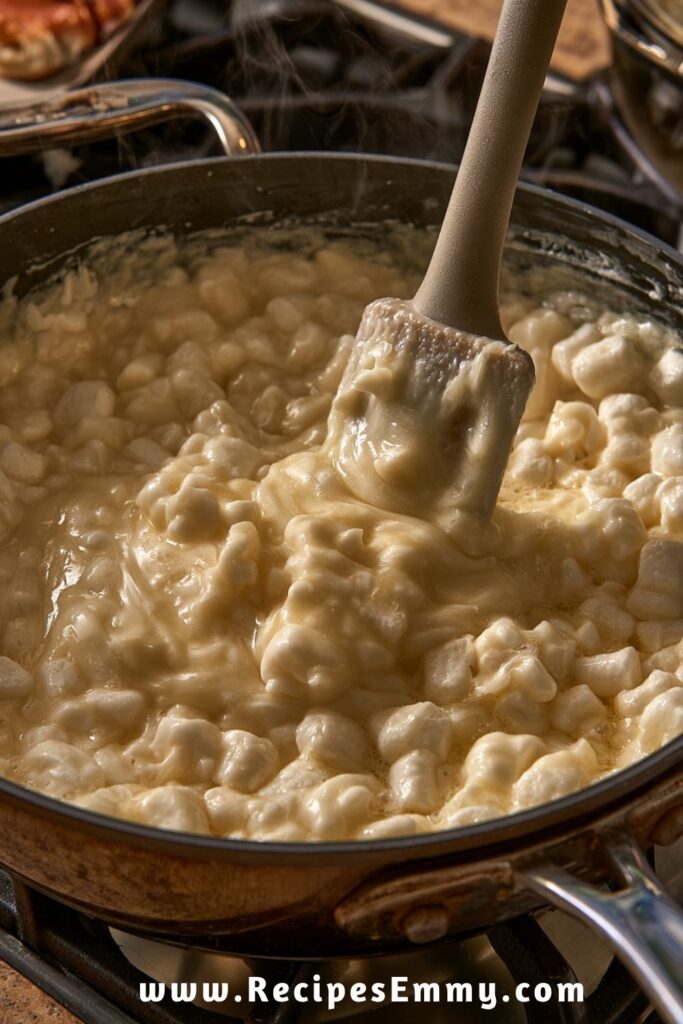
Add 5 ½ cups of mini marshmallows to the melted butter. Stir continuously or very frequently as the marshmallows soften.
Continue heating gently until the marshmallows are melted and the mixture is smooth and cohesive. Avoid letting the mixture cook longer than necessary.
Step 3: Combine With the Cereal
Remove the saucepan from the heat and add 6 cups of Rice Krispies cereal. Stir thoroughly with a sturdy spatula or wooden spoon until the cereal is evenly coated with the melted marshmallow mixture.
Work gently but efficiently so you don’t crush the cereal while mixing.
Step 4: Shape the Treats
Transfer the mixture to your prepared pan or shaping surface. Press it into an even layer using lightly buttered hands, parchment paper, or a lightly greased spatula.
Don’t compact the mixture excessively. A gentle, even press is enough to hold the treats together while keeping their texture soft.
Allow the mixture to cool and set until firm enough to cut and handle.
Step 5: Cut Into Individual Treats
Once the cereal mixture has set, cut it into individual pieces. Rectangular shapes work particularly well for the mummy design because the white chocolate can be drizzled across them like wrapped bandages.
Handle each piece carefully so it maintains its shape.
Step 6: Add the White Chocolate Bandages
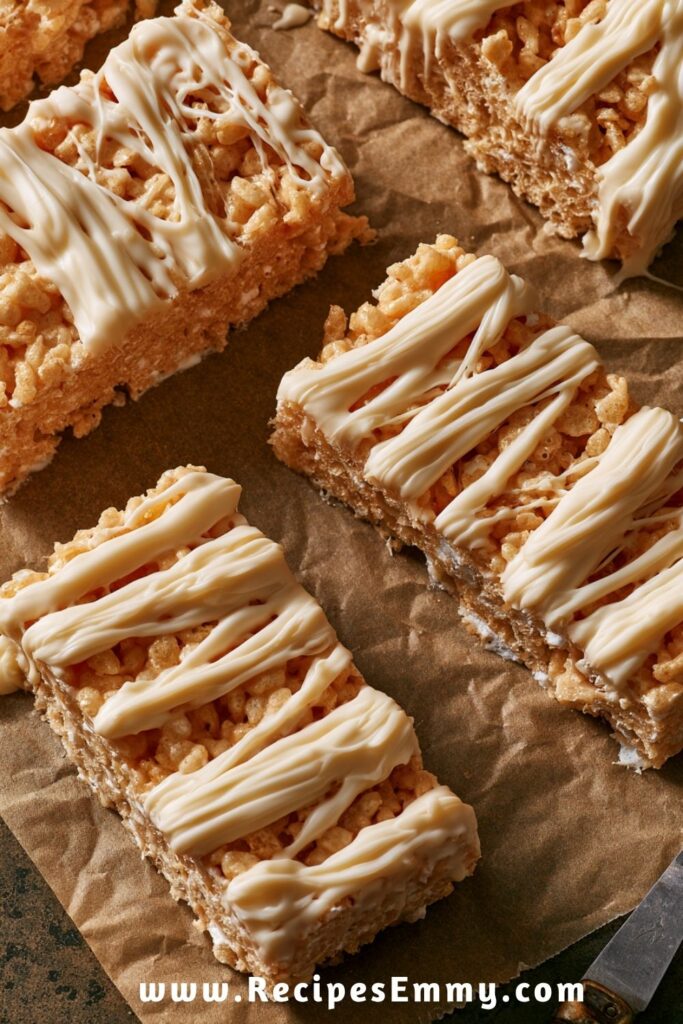
Melt 8 ounces of white chocolate or melting candy according to the package directions. Once smooth, drizzle the melted chocolate back and forth over each Rice Krispie treat.
The goal isn’t to completely cover the surface. Leave some of the cereal visible between the white chocolate lines to create the appearance of mummy wrappings.
Step 7: Add the Candy Eyes
While the white chocolate is still soft, place two candy eyeballs on each treat. Gently press them into the chocolate just enough to secure them.
If using mini chocolate chips instead, position them carefully while the chocolate is still unset.
Step 8: Let the Decorations Set
Allow the decorated treats to sit until the white chocolate has firmed up completely. Once the chocolate is set, the mummy decorations will be easier to handle and serve.
Notes
- For easier shaping: Lightly grease your hands or use parchment paper when pressing the sticky cereal mixture into the pan.
- For the mummy appearance: Drizzle the white chocolate in uneven, overlapping lines rather than making perfectly straight stripes. The irregular lines look more like wrapped bandages.
- For the eyes: Add the candy eyes immediately after drizzling the chocolate so they stick securely before the chocolate sets.
Common Mistakes to Avoid
Melting the marshmallows over high heat
High heat can cause the marshmallow mixture to become overly hot, which may lead to harder treats once they cool. Keep the heat moderate and remove the mixture from the stove as soon as the marshmallows are melted and smooth.
Packing the cereal mixture too tightly
It can be tempting to press firmly when shaping the treats, especially because the mixture is sticky. However, excessive pressure compresses the cereal and can produce dense, hard pieces. Use gentle pressure to create an even layer.
Waiting too long to add the cereal
Once the marshmallows are melted, the mixture begins to thicken as it cools. Add the Rice Krispies promptly and stir until everything is evenly coated.
Decorating before the treats have cooled
Warm cereal treats can make the white chocolate melt or spread unpredictably. Let the treats set enough to hold their shape before decorating.
Adding the eyes too late
The candy eyes need the soft chocolate to act as an adhesive. Place them while the white chocolate is still wet so they stay securely in position as the decoration sets.
What to Serve With Mummy Rice Krispie Treats
Mummy Rice Krispie Treats are naturally suited to Halloween gatherings, so they work best alongside other simple, festive treats and drinks. Since these cereal treats are sweet and chewy, pairing them with lighter or refreshing options can help balance the dessert table.
- Fresh fruit: Strawberries, grapes, apple slices, or orange segments add something fresh alongside the sweet marshmallow treats.
- Hot chocolate: A warm cup of hot chocolate makes these especially cozy for an autumn Halloween evening.
- Apple cider: Warm or chilled apple cider pairs naturally with the buttery, marshmallow sweetness.
- Halloween cookie platter: Add other Halloween-shaped cookies for a larger dessert spread.
- Ice cream: A scoop of vanilla ice cream can turn one or two Mummy Rice Krispie Treats into a more substantial dessert.
Storage Instructions
Store the finished Mummy Rice Krispie Treats in an airtight container at room temperature. Place parchment or wax paper between layers if necessary to prevent the white chocolate decoration from sticking to other treats.
They are best enjoyed while the cereal remains crisp and the marshmallow center is soft and chewy. Keeping the container tightly sealed helps prevent the treats from becoming stale.
For the best texture, avoid refrigerating them unless necessary. The refrigerator can make the cereal treats firmer and less chewy. If you do need to chill them temporarily because of warm conditions, allow them to come back toward room temperature before serving.
These treats can be prepared ahead of a Halloween party, making them convenient for entertaining. Allow the white chocolate decoration to set completely before transferring the treats to a storage container.
Estimated Nutrition
Nutrition will vary depending on the specific white chocolate or melting candy and the size of each portion. As a general estimate, one Mummy Rice Krispie Treat contains approximately 180–220 calories.
The estimate is based on the supplied quantities divided into individual portions and should be treated as approximate rather than verified nutritional information.
Frequently Asked Questions
Can I use regular-sized marshmallows instead of mini marshmallows?
The supplied recipe uses mini marshmallows because they melt efficiently with the butter. Regular marshmallows can generally be used if needed, but they should be measured by weight or adjusted appropriately rather than simply replacing them cup-for-cup.
Can I use chocolate chips instead of candy eyeballs?
Yes. The supplied ingredients allow for mini chocolate chips as an alternative to candy eyeballs. Add them while the white chocolate is still soft so they adhere to the treats.
How do I make the white chocolate look like mummy bandages?
Drizzle the melted white chocolate back and forth across each rectangular treat in uneven, overlapping lines. You don’t need perfectly straight lines—the irregular pattern helps create the wrapped-bandage appearance.
How do I keep the Rice Krispie treats soft?
The most important factors are avoiding excessive heat when melting the marshmallows and not pressing the cereal mixture too firmly into the pan. Once prepared, store the treats in an airtight container to help preserve their chewy texture.
Can I make these ahead of Halloween?
Yes. They are well suited to preparing ahead because they can be shaped, decorated, and allowed to set before being stored in an airtight container. For the best texture, keep them sealed at room temperature until serving.
Why are my Rice Krispie treats hard?
Hard treats can result from overheating the marshmallow mixture or pressing the cereal mixture too firmly when shaping it. Melt the marshmallows gently and use only enough pressure to form an even layer.
Conclusion
Mummy Rice Krispie Treats are a straightforward way to give a classic cereal treat a Halloween makeover. The chewy marshmallow-and-cereal base requires no baking, while melted white chocolate and candy eyes create the recognizable mummy design with very little decorating work.
They’re easy to prepare ahead, simple enough for kids to help decorate, and convenient to serve at Halloween parties or seasonal gatherings. With a few basic ingredients and careful attention to texture, you can turn an everyday cereal treat into a fun Halloween dessert.
Print
Mummy Rice Krispie Treats
- Total Time: 25 minutes
- Yield: 10 servings 1x
Description
These Mummy Rice Krispie Treats are chewy, crispy, and decorated with white chocolate mummy bandages and candy eyes for an easy Halloween dessert.
Ingredients
- 3 Tbsp. butter
- 5 1/2 cups mini marshmallows or 1 (10 oz.) bag of mini marshmallows
- 6 cups Rice Krispies cereal
- 8 oz. white chocolate, melted, or melting candy
- 20 candy eyeballs or mini chocolate chips
Instructions
- Melt the butter in a large saucepan over low to medium-low heat.
- Add the mini marshmallows and stir frequently until melted and smooth.
- Remove the saucepan from the heat and add the Rice Krispies cereal. Stir until the cereal is evenly coated.
- Transfer the mixture to a lightly greased pan or prepared surface. Gently press it into an even layer without packing it too firmly.
- Allow the mixture to cool and set, then cut it into individual rectangular treats.
- Melt the white chocolate or melting candy according to the package directions.
- Drizzle the melted white chocolate back and forth over each treat in irregular lines to create the appearance of mummy bandages.
- While the chocolate is still soft, place the candy eyeballs on the treats. If using mini chocolate chips, position them in the same way.
- Allow the white chocolate to set completely before serving or storing.
Notes
- Lightly grease your hands, spatula, or parchment paper when shaping the sticky cereal mixture.
- Do not press the mixture too firmly, as compacting it can make the treats dense.
- Add the candy eyes while the white chocolate is still soft so they adhere securely.
- Prep Time: 15 minutes
- Cook Time: 10 minutes
- Category: Dessert
- Method: No-Bake / Stovetop
- Cuisine: American
Nutrition
- Serving Size: 10 servings
- Calories: 200 calories
Keywords: mummy rice krispie treats, Halloween rice krispie treats, mummy treats, Halloween treats, Rice Krispie treats





Leave a Comment