
These Halloween Swirl Cream Cheese Brownies combine a rich, dark chocolate brownie layer with a smooth cream cheese topping colored in bright Halloween orange. The contrast between the deep chocolate and orange swirls makes these brownies especially eye-catching, while the simple ingredient list keeps the preparation straightforward enough for a home baker.
The brownie batter comes together with cocoa powder, eggs, vegetable oil, and vanilla for a fudgy chocolate base, while the cream cheese layer adds a creamy, lightly sweet contrast. A quick swirling technique creates the marbled Halloween design on top, so each brownie has its own festive pattern after baking.
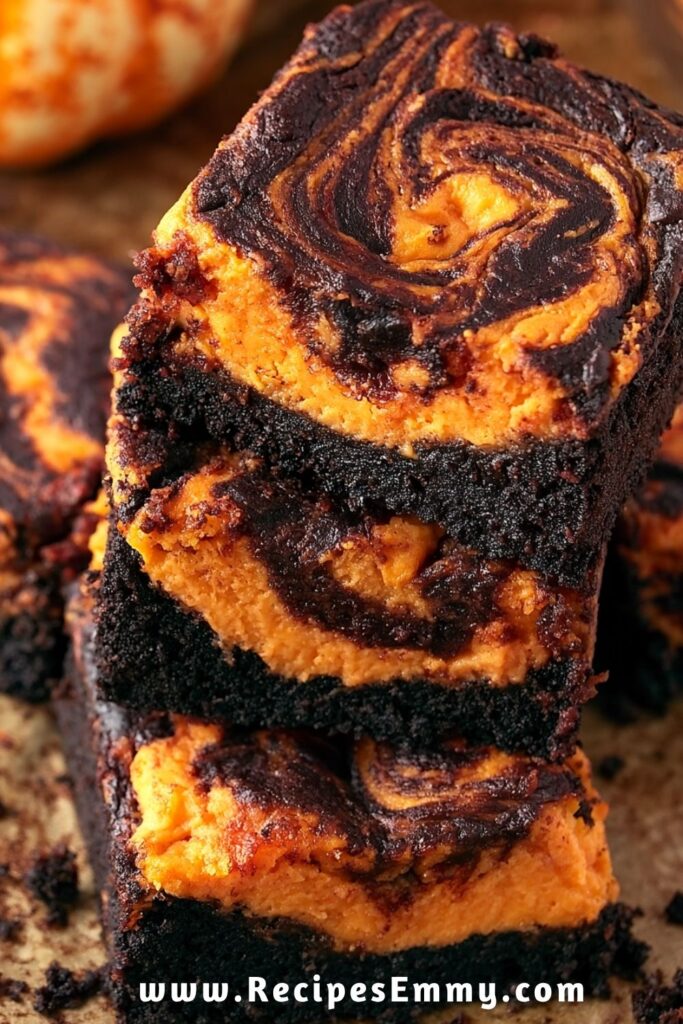
Why You’ll Love These Halloween Swirl Cream Cheese Brownies
- Festive without complicated decorating: The orange-and-chocolate swirl creates a Halloween look directly in the baking pan.
- Rich chocolate flavor: Hershey’s Special Dark cocoa powder gives the brownie layer a deep cocoa taste that pairs naturally with the tangy cream cheese.
- Creamy contrast: The cream cheese layer adds a smooth texture against the denser brownie base.
- Simple ingredients: Most of the ingredients are everyday baking staples, with orange food coloring providing the main Halloween touch.
- Easy to portion: Once completely cooled, the brownies can be cut into squares or rectangles for a Halloween dessert table, party, or family treat.
Preparation and Tools
Start by bringing the cream cheese to room temperature. This is important because softened cream cheese blends more smoothly with the sugar, egg, and vanilla. Cold cream cheese can remain lumpy, making it harder to create an even cream cheese layer.
You will need mixing bowls for the brownie and cream cheese mixtures, a whisk or hand mixer, a spatula, and a baking pan. A toothpick or thin knife is useful for creating the decorative swirls in the cream cheese layer.
For the cleanest presentation, line the baking pan with parchment paper if available, leaving some overhang along the sides. This makes it easier to lift the cooled brownies from the pan before slicing.
Preparation Tips
Use room-temperature cream cheese. Allow the cream cheese to soften before mixing. It should be easy to stir and free of hard pieces.
Don’t overmix the brownie batter. Once the flour and cocoa are incorporated, mix only until the dry ingredients disappear. Overmixing can make the brownies less tender.
Sift or whisk the cocoa with the dry ingredients. Dark cocoa powder can form small lumps, so thoroughly combining it with the flour, salt, and baking powder helps distribute it evenly throughout the batter.
Color the cream cheese layer gradually. Add the orange food coloring a little at a time and mix until the desired Halloween orange is reached. The exact amount can vary depending on the type and strength of the food coloring.
Create the swirl before baking. Once the cream cheese mixture is spread over the brownie batter, use a toothpick or thin knife to gently drag through the layers. Don’t mix the two batters together; the goal is to create defined orange-and-chocolate ribbons.
Ingredients
For the Brownie Layer
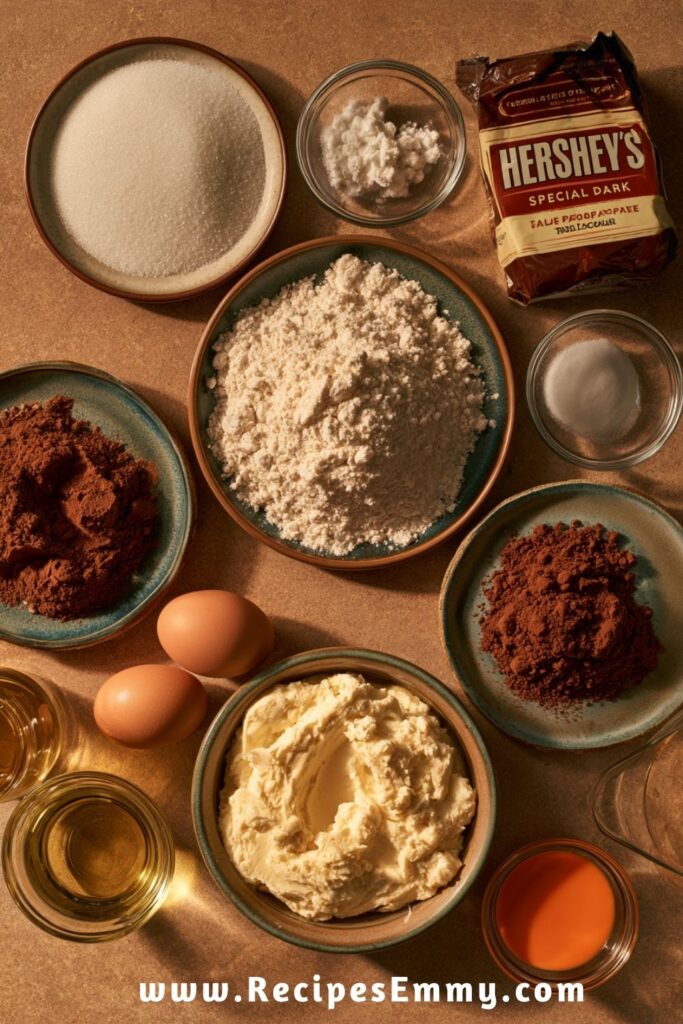
Granulated white sugar sweetens the brownie batter and contributes to its texture.
All-purpose white flour provides the structure needed for the brownies while keeping the layer tender.
Hershey’s Special Dark cocoa powder supplies the main chocolate flavor and gives the brownie layer its especially dark color, which makes the orange cream cheese swirl stand out.
Salt balances the sweetness and enhances the cocoa flavor.
Baking powder provides a small amount of lift so the brownies aren’t overly dense.
Eggs help bind the ingredients and contribute structure and richness.
Vegetable oil gives the brownies moisture and a soft texture.
Vanilla extract rounds out both the chocolate and cream cheese flavors.
For the Cream Cheese Layer
Cream cheese forms the smooth, tangy base of the topping. Bringing it to room temperature makes it much easier to blend.
Granulated white sugar lightly sweetens the cream cheese layer.
Egg helps the cream cheese layer set as it bakes.
Vanilla extract adds a subtle sweetness and complements the chocolate.
Orange food coloring gives the cream cheese layer its distinctive Halloween color.
Cooking Instructions
Step 1: Prepare the Brownie Batter
Begin by combining the granulated sugar, all-purpose flour, Special Dark cocoa powder, salt, and baking powder in a mixing bowl. Whisk the dry ingredients together thoroughly so the cocoa powder and baking powder are evenly distributed.
In a separate bowl, whisk together the two eggs, vegetable oil, and vanilla extract. Add the wet mixture to the dry ingredients and stir until everything is just combined. The finished batter should be thick and chocolatey, with no visible streaks of flour.
Avoid continuing to mix once the batter has come together. The brownie mixture doesn’t need extensive beating, and gentle mixing helps maintain a tender texture.
Step 2: Mix the Cream Cheese Layer
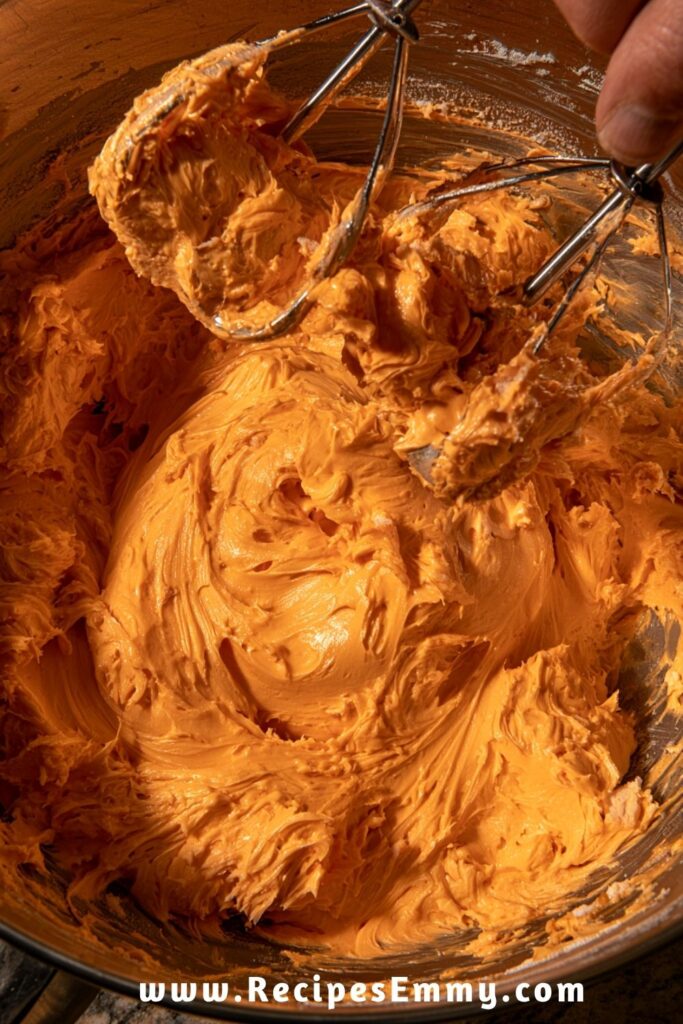
Place the room-temperature cream cheese in a clean mixing bowl. Beat or stir it until smooth, then add the granulated sugar, egg, and vanilla extract.
Continue mixing until the cream cheese mixture is creamy and evenly combined. Scrape down the sides of the bowl as needed so there are no large pieces of cream cheese left behind.
Add orange food coloring and mix until the cream cheese mixture has an even orange color. Add the coloring gradually so you have better control over the final shade.
Step 3: Layer the Brownie Batter
Prepare your baking pan, using parchment paper if desired for easier removal. Transfer the brownie batter to the prepared pan and spread it into an even layer with a spatula.
Take your time spreading the batter, particularly into the corners. An even brownie layer gives the cream cheese topping a consistent base and helps the finished brownies bake more evenly.
Step 4: Add the Orange Cream Cheese
Spoon the orange cream cheese mixture over the brownie layer. Spread it gently across the surface without pressing too deeply into the chocolate batter.
It doesn’t have to look perfectly smooth at this stage because the next step will create the decorative pattern. Try to distribute the cream cheese mixture reasonably evenly so that each portion will contain some of the creamy topping.
Step 5: Create the Halloween Swirl
Use a toothpick or thin knife to gently swirl the orange cream cheese mixture through the brownie batter.
Drag the tool through the surface in curved lines, loops, or a simple back-and-forth pattern. Keep the movements shallow and controlled. Too much swirling will blend the orange cream cheese and chocolate together, while a lighter touch will leave the contrasting colors clearly visible.
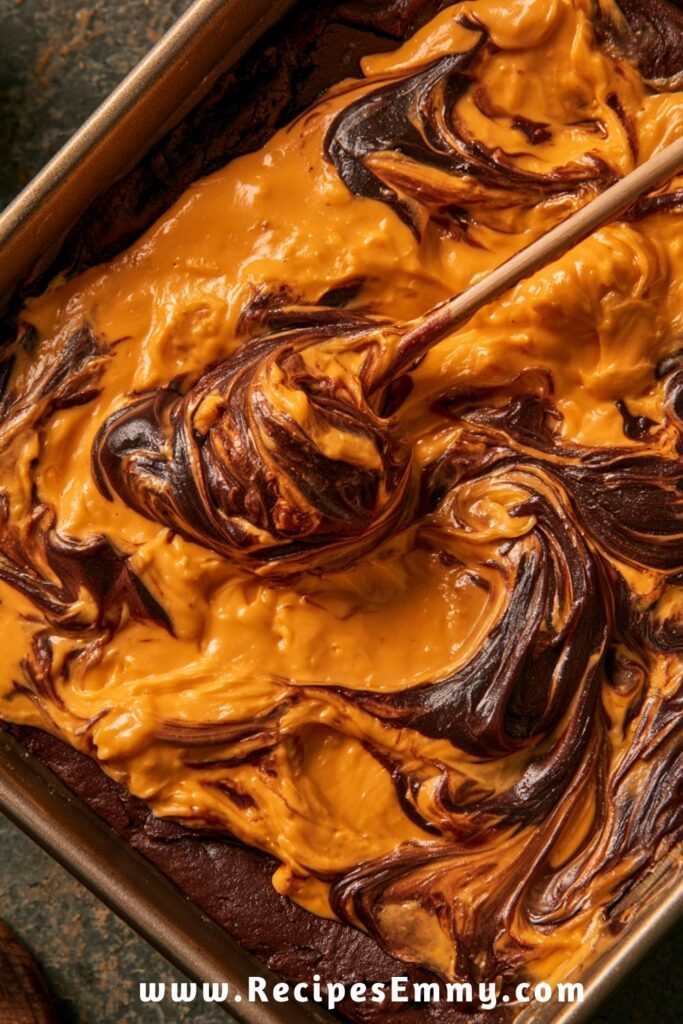
The goal is a marbled appearance rather than a fully mixed batter, so stop once you have an attractive swirl pattern across the top.
Step 6: Bake Until Set
Place the pan in the preheated oven and bake according to the recipe’s baking time until the brownie layer is cooked and the cream cheese topping is set.
Keep an eye on the center as the brownies approach the end of baking. The cream cheese surface should no longer look loose, while the brownie portion should be set without becoming excessively dry.
Because oven temperatures and baking pans can vary, visual cues are useful alongside the recipe’s stated baking time. Allow the brownies to cool completely before attempting to cut them.
Step 7: Cool and Slice
Remove the brownies from the oven and let them cool in the pan. Cooling is an important part of getting clean layers and neat slices because the cream cheese topping needs time to firm up.
Once completely cooled, lift the brownies from the pan if you used parchment paper. Use a sharp knife to cut them into individual squares or rectangles, wiping the blade between cuts when necessary for cleaner edges.
The finished brownies should show a dark chocolate base beneath a creamy orange topping with visible Halloween-inspired swirls.
Notes
For the strongest visual contrast, use a sufficiently dark cocoa powder and a bright orange food coloring. The dark brownie layer provides the backdrop that makes the orange cream cheese design especially noticeable.
If you want cleaner-looking swirls, make fewer passes with the toothpick or knife. A simple pattern often produces a more defined marbled effect than repeatedly dragging through the batter.
For easier slicing, make sure the brownies are fully cooled before cutting. Warm brownies are softer and can cause the cream cheese layer to smear across the knife.
What to Serve With Halloween Swirl Cream Cheese Brownies
These brownies are rich enough to serve on their own, but a few simple additions can make them even more enjoyable for a Halloween gathering.
- Fresh berries: Strawberries or raspberries add a tart, fresh contrast to the rich chocolate and cream cheese.
- Vanilla ice cream: A small scoop of vanilla ice cream works especially well with the dark cocoa flavor.
- Freshly brewed coffee: The bitterness of coffee complements the sweetness and deep cocoa flavor of the brownies.
- Cold milk: A glass of cold milk is a simple pairing that works particularly well with fudgy chocolate brownies.
- Halloween dessert platter: Cut the brownies into small squares and arrange them alongside other homemade Halloween treats for a colorful dessert spread.
Because the cream cheese topping is an important part of the finished texture, these brownies are best served fully cooled rather than warm from the oven.
Storage Instructions
Because these brownies contain a cream cheese layer, store leftovers in the refrigerator rather than leaving them at room temperature for an extended period. Place the cooled brownies in an airtight container and refrigerate them.
For the neatest storage, place parchment paper between layers if you need to stack the brownies. This helps prevent the orange cream cheese topping from sticking to the brownie above it.
When you’re ready to serve them, the brownies can be enjoyed chilled or allowed to sit at room temperature briefly to soften slightly. If you prefer a firmer cream cheese layer and cleaner slices, serve them directly from the refrigerator.
For make-ahead preparation, the brownies can be baked and completely cooled before being refrigerated. This also makes them convenient for preparing ahead of a Halloween gathering.
Estimated Nutrition
Nutritional values will vary depending on the exact ingredients used, the size of the brownies, and how many portions the pan is divided into. Based on the supplied ingredients, these brownies are estimated to provide approximately 180–220 calories per serving, assuming the batch is divided into 16 portions.
The estimate is intended as a general guide rather than verified nutritional information.
Frequently Asked Questions
Can I use regular cocoa powder instead of Special Dark cocoa powder?
Yes. Regular unsweetened cocoa powder can be used if Special Dark cocoa powder isn’t available. However, the brownies will have a lighter chocolate color, so the contrast with the orange cream cheese layer may not be quite as dramatic.
Why does the cream cheese need to be at room temperature?
Room-temperature cream cheese blends much more easily with the sugar, egg, and vanilla. It helps create a smoother mixture with fewer lumps, which is especially useful when spreading the orange layer over the brownie batter.
How do I get defined Halloween swirls?
Use a toothpick or thin knife and make only a few deliberate passes through the orange cream cheese layer. Gentle curves, loops, or back-and-forth movements will create a marbled effect. Avoid excessive swirling because it can blend the chocolate and orange layers together.
Can I make the brownies ahead of time?
Yes. These brownies are well suited to making ahead because they need to cool completely before slicing. Once cooled, refrigerate them in an airtight container until you’re ready to serve them.
Why should I cool the brownies completely before cutting?
The brownie layer and cream cheese topping become firmer as they cool. Cutting while they’re still warm can cause the cream cheese layer to smear and make the individual pieces harder to shape neatly.
Can I make the orange color darker?
Yes. Add the orange food coloring gradually until you reach the shade you want. Since food coloring strengths vary, adding it little by little gives you better control and helps prevent adding more than necessary.
Conclusion
Halloween Swirl Cream Cheese Brownies bring together a dark, chocolatey brownie base and a smooth orange cream cheese topping in one simple dessert. The marbled design does most of the decorating work, making these brownies festive without requiring frosting or elaborate decorations.
For the best result, focus on a smooth cream cheese mixture, an even layer, and gentle swirling. Once the brownies have cooled completely, the contrasting orange and chocolate layers make each slice ready for a Halloween dessert table.
Print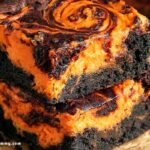
Halloween Swirl Cream Cheese Brownies
- Total Time: 40 minutes
- Yield: 16 brownies 1x
Description
Rich dark chocolate brownies topped with creamy orange-colored cream cheese and gently swirled into a festive Halloween design.
Ingredients
For the Brownie Layer
- 1 cup granulated white sugar
- ½ cup all-purpose white flour
- ½ cup Hershey’s Special Dark cocoa powder
- ½ teaspoon salt
- ¼ teaspoon baking powder
- 2 large eggs
- ⅓ cup vegetable oil
- 1 teaspoon vanilla extract
For the Cream Cheese Layer
- 8 oz cream cheese, at room temperature
- ¼ cup granulated white sugar
- 1 large egg
- ½ teaspoon vanilla extract
- Orange food coloring
Instructions
- Preheat the oven according to the recipe and prepare a baking pan, lining it with parchment paper if desired.
- Whisk together the granulated sugar, flour, Special Dark cocoa powder, salt, and baking powder in a mixing bowl.
- In a separate bowl, whisk together the eggs, vegetable oil, and vanilla extract.
- Add the wet ingredients to the dry ingredients and stir just until combined. Do not overmix.
- For the cream cheese layer, beat the room-temperature cream cheese until smooth.
- Add the sugar, egg, and vanilla extract and mix until creamy and evenly combined.
- Add orange food coloring gradually, mixing until the cream cheese reaches an even orange color.
- Spread the brownie batter evenly into the prepared baking pan.
- Spoon the orange cream cheese mixture over the brownie layer and gently spread it across the surface.
- Use a toothpick or thin knife to gently swirl the orange cream cheese through the brownie batter, creating a marbled Halloween pattern without fully mixing the layers.
- Bake until the brownie layer is set and the cream cheese topping is no longer loose in the center.
- Remove from the oven and allow the brownies to cool completely in the pan.
- Once cooled, lift the brownies from the pan if using parchment paper and cut into squares or rectangles.
Notes
- Bring the cream cheese to room temperature before mixing for a smoother topping.
- Add orange food coloring gradually so you can control the intensity of the color.
- Swirl gently with a toothpick or thin knife to keep the orange and chocolate colors distinct.
- Cool the brownies completely before slicing for cleaner pieces.
- Prep Time: 15 minutes
- Cook Time: 25 minutes
- Category: Dessert
- Method: Baked
- Cuisine: American
Nutrition
- Serving Size: 16 brownies
- Calories: 180–220 calories
Keywords: Halloween swirl cream cheese brownies, Halloween cream cheese brownies, Halloween brownies, swirl brownies, cream cheese brownies


Leave a Comment